Tuesday, December 2, 2014

Gingerbread Toffees

Every year, for quite some time now, I've made gingerbread toffees around this time of year.

Until now, I've always made them in the microwave oven. This year though, I decided to make them the "normal" way, in a pot. The downside is that it's a bit trickier, but on the plus side, I can make more at once, eliminating the need to make several batches, and I have much more control over the consistency of the resulting toffees.

125°C gives me a toffee with the perfect texture, hard enough to handle easily, but soft enough that it melts and goes soft in the mouth.


Ingredients
50g Butter
3 dl Whipping cream
1,5 dl golden syrup
3 dl Sugar
6 ml Cinnamon
6 ml Cloves (ground)
6 ml Ginger (ground)


First of all, this recipe requires a few utensils, best to get them out first. You'll need a large(ish) pot to cook the toffee in, the best is a large, fairly wide one (wilde so that it heats faster, large so that it doesn't boil over). I used a 5 liter one. You'll also need a thermometer that goes up to more than 125°C. Finally, prepare a "mold" to pour the toffee into once it's done, I used a 20x20 cm one, but slightly smaller or larger isn't a big deal. Cover the mold in baking paper.

Tip #1: scrunch up the baking paper and smooth it back out a few times first, it'll make it softer and easier to fit into the mold.

Tip #2: Keep a bowl of water next to you, the toffee is VERY hot, and unlike water, it'll stick to your skin. If some gets on you, cool it down quickly.

Place all the ingredients into the pot, and turn the stove to medium-high. Stir a bit while it melts.

Once it has melted, turn the stove down to medium and let it come to a boil. Measure the temperature constantly, stirring occasionally, it'll darken a bit after a while. Once the toffee reaches 125°C, it's done, remove from the heat and stir vigorously until it stops boiling. 

Pour into the mod and let cool. Then cut into bite-sized pieces, with either a knife or scissors, and wrap in pieces of baking paper.

Friday, November 21, 2014

Netflix on standalone XBMC in Linux

For a long time, getting Netflix working on Linux was really tricky. On a standalone Linux XBMC HTPC system, it was virtually impossible, so much so that I didn't even try it. Now though, with Chrome supporting HTML5, it's a lot easier.

I used NetfliXBMC + Chrome Launcher. NetfliXBMC lets you browse the content in XBMC, and can then launch the selected content to play in Google Chrome.

I'm using Arch Linux, with XMBC, without a desktop environment, you may be able to skip some of these steps, or adapt them according to your configuration.

Anyway, here's how I did it.

Update: Edited to reflect that there is a new repository and a new thread for NetfliXBMC on the Kodi forums.

Update 2: In Helix, it is not possible to start/stop openbox at launch/close of chrome, it must be started before Kodi does. So I have updated the script and added step for how to do this.

Get Chrome and NetfliXBMC up and running

  1. Install the XBMC repository for Chrome Launcher, you can find a link to it on the Chrome Launcher Kodi forum thread
  2. Install Google Chrome (need at least version 37, AUR has version 38, and that's the one I installed)
    1. Download the package file from AUR
    2. Instruction for how to install from AUR can be found here. Make sure to use the -s argument when you do makepkg, since it includes dependencies.
  3. Install Openbox window manager and xdotool: sudo pacman -S openbox xdtool
  4. Edit your kodi startup script (probably /usr/bin/kodi-standalone), and add "openbox &" (without the quotation marks) as the first instruction in it (immediately after the copywrite stuff). OBS: It seems that this gets lost when you update the Kodi package, so it needs to be redone when that happens 
  5. Create a script for launching Google Chrome (I simply called it chrome.sh and placed it in the xbmc home folder). It moves the mouse pointer off screen and starts Google Chrome.
    #!/bin/bash
    xdotool mousemove 0 740 &
    /opt/google/chrome/google-chrome $*
  6. Make the script executable: chmod + x chrome.sh
  7. Set Chrome launcher to start using this script
    1. Go to Add-On Settings
    2. Toggle "Use custom chrome/script path"
    3. Select "Chrome/script path", browse and select your script
  8. Install NetfliXBMC, you'll find it in the repository here
  9. In the Add-on settings for NetfliXBMC, enter you Netflix username and password, the rest of the settings are up to you

Video settings

My system runs natively at 720p, but XBMC runs at 1080p, this means that it'll change to 720p when Chrome opens.
  1. To fix this issue, I placed a config file in /etc/X11/xorg.conf.d/ (actually I added to one I already had, named 20-intel.conf):
    Section "Screen"
        Identifier             "Screen0"
        Device                 "Intel Graphics"
        Monitor                "PANASONIC TV"
        DefaultDepth           24
        SubSection             "Display"
            Depth              24
            Modes              "1920x1080"
        EndSubSection
    EndSection

Audio settings

Looking at the forums, there seems to be a lot of users that have a problem with this.

While audio works fine in XBMC, it didn't work at all outside of it (ie in Chrome) for me. Having looked around the forums on this, there seems to be many for which this is the case.
  1. In XBMC, set "Settings -> System -> Audio output -> Keep audio device alive" to "Off"
  2. Install alsa-utils: pacman -S alsa-utils
  3. From command line: alsamixer
  4. Unmute and raise volume for the channels that you are using
  5. You need the card and device numbers for the soundcard that you are using (even if it is built in): aplay -l
  6. Create a file (if it doesn't already exist) in the xbmc home directory (for me, /var/lib/xbmc), called .asoundrc, and place this info in it (replace card and device numbers with your own found above)

    pcm.!default {
        type hw
        card 0
        device 3
    }

Controls

If you are using a remote control, you'll want to assign one of the buttons to Esc or Alt+F4, in order to close Chrome when you are done watching something.

Aside from that, both Enter and Space work as play/pause, and since I use Enter to select a movie to play in XBMC anyway, that works out. The left and right arrows step back and forward in the movie, so they work kind of like rewind/fast forward (actually, I prefer the steps).

I kind of wish that I could access the sound/subtitle settings as well, but I haven't yet found a (good) way to do this.

Finally, if you absolutely feel that you want to use "p" (ie the same as play button in XBMC) to play/pause, there is an extension for Chrome that can make this happen called Flix Plus.

Remaining issue

My one gripe is that I only get stereo sound, rather than surround. After googling a bit, it turns out that surround sound is not supported by Netflix when using a HTML5 browser... So basically, it's Netflix's fault. Still, I think I prefer a nice and convenient interface and stereo audio, to my BD players slow-a** interface with surround. Maybe fire up the BD or Xbox if there is a specific movie that I really want 5.1 audio on.

Friday, September 19, 2014

Salted Caramel Macarons

It was my turn to bring cookies to work this Friday, and I decided to make salted caramel filled macarons.

In my search for a recipe for the filling, I came across a new recipe for the macarons themselves. I learned that the recipes that I've been using up to now were the "french version", but that there is another option, the "italian version". The difference is in how the meringue is done.

I decided to try the "italian version", and I don't think I'll be going back.

This adds a tiny amount of complexity to making the batter, but it also makes it much more stable and consistent.

I found the recipe from another blog, which linked to another blog, which had the recipe but also referred to the book it came from... No offense to other bloggers, but I'll just say that this recipe is from the book "Bouchon Bakery". If you like the recipe, buy it. It looks to have a lot of good recipes, and I'll probably be making something else from it before long.

You can leave out the instant espresso if you like, it's just a very subtle flavor and gives a slight tinge to the macarons.

Salted caramel macarons


Ingredients - Macarons
212g Almond meal
212g Powdered sugar
82g + 90g Egg whites
236g + a pinch Granulated sugar
158g Water
0,5 tsp Instant Espresso (optional)

Ingredients - Salted Caramel
2,35 dl Whipping cream
3,55 dl Granulated sugar
2 tsp Salt (preferably coarse)
220g Butter


First, to make the macarons. 

Preheat the oven to 180°C.

Sift the almond meal and powdered sugar into a large bowl and whisk together. Make a well in the center, but leave a bit of almond sugar at the bottom. Pour in the 82g of egg whites, and optionally, the instant espresso. Mix together using a flexible spatula, you should get a fairly thick mixture.

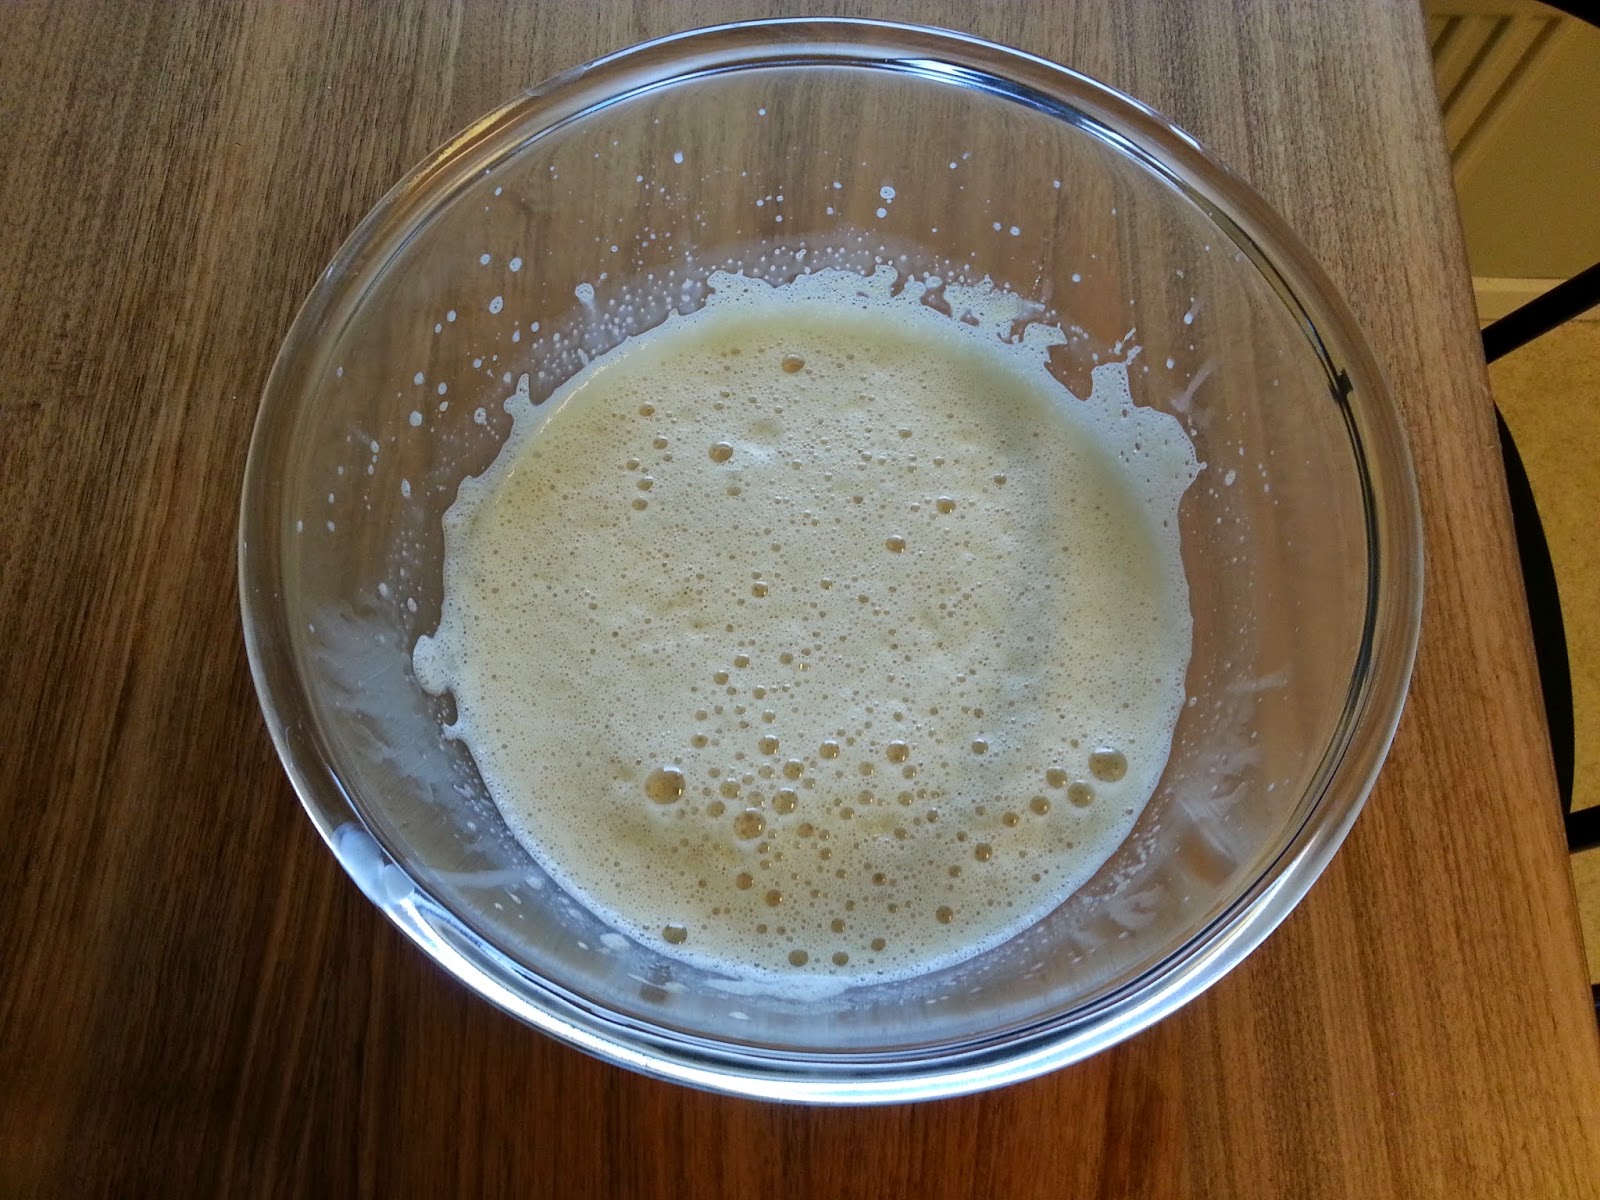
Now comes the bit that makes this "italian", and italian meringue. Put the 90g of egg whites into a bowl, and get your electric whisk ready. Put the granulated sugar and water into a pot, and place on the stove over a medium-high heat. You want to bring the sugar to 120°C at the same time as the meringue reaches soft peaks... The sugar takes some time to reach this temperature, so you don't need to start the meringue until the sugar reaches 100-110°C. At that time, add a pinch of sugar, and whisk at medium speed until it reaches soft peeks. As soon as the sugar reaches 120°C, take it off the heat, and slowly trickle into the meringue while whisking. Continue to whisk at medum-high speed for a few minutes, until it's firm and glossy, and the meringue has cooled (the bowl might still be warm, that's fine).

Fold 1/3 of the italian meringue into the almond mix, then continue folding the meringue in, a little bit at a time. You probably won't need quite all of it, but most of it. You are looking for a texture, where it is still somewhat firm, but but not too firm. It should still form ribbons, but sort of "relax" into itself. The best way to think of it is probably this, we are about to pipe this onto a tray, as we do we'll get a peak, the mixture should be soft enough that the peak collapses into the batter so that we get a smooth top, but also firm enough that it doesn't go completely flat.

Pipe the batter, using a circular hole tip, onto a baking tray covered with grease proof paper. You are looking for about 4cm in diameter (they'll grow a little as they settle down, so keep that in mid as you pipe the next one).

Place in the middle of the oven, immediately turn it down to 160°C, and bake for 9-12 minutes.

As you take them out, do so gently, a bang will make them collapse a bit (not a disaster, but still).

Let them rest on the tray for about 5 minutes, then transfer to a rack for cooling.

Heat the oven up to 180°C again, and repeat until all the batter is baked.

Now for the salted caramel.

Cut up the butter into small pieces, and leave in room temperature.

Place the cream and salt into a small pot. Place the sugar into a wide pot (the thinner the layer of sugar, the easier it'll be).

Bring the cream to the boil, and take of the heat. In the meantime, melt the sugar over a medium-high heat. As the sugar melts and starts getting dark, it might be a good idea to warm up the cream again, it really needs to be warm when it's combined with the caramel, or it won't work.

Once the sugar has become a dark brown caramel (around 175-180°C), take it off the heat and, while whisking, slowly pour in the warm cream. Be careful! It'll bubble and spit, and you do not want this stuff on you.

Once it has cooled to a reasonable temperature (50-60°C), stir in the butter, a little at a time. Place in a shallow container and let cool in the fridge.

To finish up.

Place the salted caramel into a bowl, and whisk (by hand, it's important not to over whisk it, as it'll separate). It should become softer making it easy to pipe.

Match cookies that are the same size, pipe some caramel onto one of them, sprinkle with a small amount of coarse salt, then place the other one on top and twist until the filling fits nicely along the edges.


Wednesday, September 10, 2014

CyanogenMod 11 on Samsung Galaxy S III

A couple of weeks ago, I decided to update my phone to the latest version of CyanogenMod, version 11, running Android 4.4 KitKat. CM11 has not yet reached stable, so I decided to go with the "snapshot" from early august, M9. Since it wasn't in stable yet, I wasn't sure what to expect, but I have to say, I am very pleasantly surprised.

As I was already using an earlier version of CyanogenMod, I already had the correct recovery SW installed, and could skip a lot of the stuff I had to do last time. Installation was in fact, a snap.

Just download the firmware and Google Apps, copy them to the SD-card, boot into recovery mode (switch off, then Volume up + Home + Power), flash the CM11 and then the GApps zip-file, and perform a "Wipe data/factory reset".

Reboot, and I was welcomed by the setup screen for what felt like a brand new phone.

As I said, I've been using this for a couple of weeks now, and I have yet to find a single bug. There has been some talk of possible Bluetooth issues (poor Harald), and I can't really speak to it as I haven't used it yet. But in everyday use, it works perfectly. If anything, it's faster and smoother than CM10.2 (Jelly Bean), and the battery life has increased significantly (CM10.2 was by no means bad in this area).

I'm lovin' me some KitKat right now, and so should you.

Tuesday, August 12, 2014

New Arch Linux + XBMC Installation guide


I decided to upgrade my HTPC with a SSD system drive, and a larger HDD for storage. Since I'm changing the system drive, that means a reinstall. As I did it, I found that quite a few things had changed since last time, so I made a new guide.

Compared to before, some things are easier to do, and some are more difficult.


My installation has no window manager, it is just XBMC on top of Arch Linux. If you want to be able to switch to a "normal" desktop environment for using a web-browser etc, then you can easily do that in addition to the things described in this guide, Google is your friend here.

Some of the things in this guide are optional, or HW-dependent. For both these cases I have tried to clearly mark them as such, as well as describing what they are for.

Preparation

Download the latest version of ArchLinux from archlinux.org and burn onto a CD/DVD or use a tool like dd (Don't use Unetbootin, it doesn't work with Arch Linux) to install to a USB-drive. You can find instructions here.

Boot the computer from this drive and select the appropriate version.
Once booted into the live environment, you can open additional terminals and switch between them with ALT+Fx, where x is the number of the terminal, the original one is 1. Login is “root” with no password needed.

The procedure is a little different depending on if you are using UEFI or not, I'm not. If you are, then there are some additional steps needed. Please see the Beginners' guide on the ArchWiki for details.

Later on during the installation, I realized that I had forgotten to create a swap partition, so I'm using a swap file instead. If you want a swap partition, do that during the other partitioning.

Installation

  • If needed change keyboard layout with the “loadkeys” command, the available keymaps can be sound under /usr/share/kbd/keymaps
    • loadkeys sv-latin1 (Swedish keyboard in this case)
  • You might need to setup an internet connection at this stage. If you have a wired DHCP connection, it should work without doing anything, if not, then you'll need to do some work on it.
  • Partition disks
    • First find your disks, and which is which
      • lsblk -o NAME,FSTYPE,SIZE,LABEL
    • Decide if you are going to use MBR or GPT partition tables, for disks over 2 TB GPT is required (you can mix and match MBR and GPT disks)
      • MBR: fdisk /dev/sdx
        • Type "o" + ENTER to create partition table
        • Type "n" + ENTER to create partition
        • For the rest of the options, the only thing you really need to enter is the size of the partition (unless you are using the entire disk, the  you don't even need that), leave the rest as default
        • Repeat from "n" for more partitions
        • Type "p" + ENTER to preview the partitions
        • Type "w" + ENTER to write the partitions to the disk 
      • GPT: cgdisk /dev/sdx
        • Choose "New"
        • For the rest of the options, the only thing you really need to enter is the size of the partition (unless you are using the entire disk, the  you don't even need that), leave the rest as default
        • Choose "Write", then "Quit"
      • Replace x with the letter for the drive you want to partition
  • Format (to ext4 filesystem in this case) and name your root partitions
    • List your partitions
      • lsblk -o NAME,FSTYPE,SIZE,LABEL
    • Format
      • mkfs.ext4 /dev/sdxy
    • Label
      • e2lable /dev/sdxy <label>
    • Replace x with the drive letter and y with the number
  • Repeat previous step for any other partitions you want to format
  • Edit the mirrorlist and move your closest mirror to the top of the list
    • nano /etc/pacman.d/mirrorlist
  • Mount the new root partition under /mnt
    • mount /dev/sdxy /mnt
    • Again, replace x with the drive letter and y with the number for your root partition
  • Install the base system
    • pacstrap /mnt base base-devel
  • Generate basic fstab
    • genfstab -U -p /mnt >> /mnt/etc/fstab
  • chroot into the new system
    • arch-chroot /mnt
  • If you want to have other disks automounted, edit fstab and add drives, find the UUID with blkid. This can be done later during the setup or any other time as well.
    • nano /etc/fstab
#
# /etc/fstab: static file system information
#
# <file system> <dir> <type> <options> <dump> <pass>
# /dev/sdb6 LABEL=root
UUID=fb22b964-b38f-42df-bded-d9ac6df54ec5 / ext4 rw,relatime,data=ordered 0 1
# /dev/sdb5 LABEL=swap
UUID=21ecefbb-1c9d-48fa-a5f3-c9ba9a09b547 swap swap defaults 0 0
# /dev/sdb6 LABEL=home
UUID=d0e114fa-b428-4605-851d-504c86c0e7ac /home ext4 defaults 0 2 
  • Open /etc/hostname and add you computers name
    • echo XBMC > /etc/hostname
    • You can replace "XBMC" as the hostname with whatever you want of course
  • Symlink your local time with the correct timezone
    • ln -s /usr/share/zoneinfo/Europe/Stockholm /etc/localtime
  • Open locale.gen, uncomment the language profile you want and generate the profile
    • nano /etc/locale.gen
    • locale-gen
  • Add language config, I'm using english US here. Use the same as the one you uncommented above
    • echo LANG=en_US.UTF-8 > /etc/locale.conf
  • Export locale
    • export LANG=en_US.UTF-8 
  • Add permanent keyboard mapping (Swedish keyboard in this case)
    • echo KEYMAP=sv-latin1 > /etc/vconsole.conf
  • Set the HW clock to use UTC (careful with this if you are multibooting with other OS's)
    • hwclock --systohc --utc
  • Find NW-card interface, configure and start wired DHCP (again, if you are using something else, set that up), I'm using this temporarily, I'll setup static IP later on
    • Use ip link to find the name of the NW interface
    • systemctl enable dhcpcd@enp4s0.service
    • systemctl start dhcpcd@enp4s0.service
    • Replace enp4s0 with the name of your interface
  • If needed, edit mkinitcpio.conf
    • nano /etc/mkinitcpio.conf
    • HW-dependent: Add “i915” under MODULES if using compatible intel video-card
  • Generate initial RAM-disk
    • mkinitcpio -p linux
  • Install GRUB
    • pacman -S grub
    • grub-install --target=i386-pc –recheck /dev/sdx (where x is the device that root is on. DO NOT USE THE NUMBER THAT USUALLY FOLLOWS, this is installed on the device, not the partition.
  • Configure GRUB
    • If needed you can configure grub in /etc/default/grub
      • nano /etc/default/grub
      • Change GRUB_TIMEOUT to preferred value
      • HW-dependent: If using Intel Sandy Bridge  video drivers, change so that GRUB_CMDLINE_LINUX_DEFAULT="quiet i915.i915_enable_rc6=0" 
      • grub-mkconfig -o /boot/grub/grub.cfg
  • Install and enable ssh, you could do this later, but I like to do it here, so I can do the rest of the setup over ssh
    • pacman -Su openssh
    • systemctl enable sshd
  • Set root password
    • passwd
  • Change the NW setup from DHCP to static IP
    • systemctl stop dhcpcd@enp4s0.service
    • systemctl disable dhcpcd@enp4s0.service
    • cd /etc/netctl
    • cp examples/ethernet-static my_network
    • nano my_network
    • Change the values for the interface, ip-addr, gateway and DNS to ones you are using
    • I had some problem with it not working if the router wasn't on when I started the HTPC, to fix this, add the following line at the end of the file
      • SkipNoCarrier=yes
    • netctl enable my_network
  • Exit chroot
    • exit
  • Unmount root partition
    • umount /mnt
  • Reboot

Setup

  • You should be able to do the rest over ssh if you want now
  • Add multilib support if you are using 64-bit version and think you might need support for 32-bit applications
    • nano /etc/pacman.conf
    • Uncomment "Multilib" rows
  • Install additional packages (The ones marked in red are optional)
    • pacman -Syu mesa alsa-utils ntp avahi nss-mdns shairplay libplist polkit xbmc xorg-server xorg-xinit xorg-utils xorg-server-utils upower udisks
      • ntp: For synching the time with a network serve
      • avahi & nss-mdns & shairplay & libplist: For Airplay support
  • Install video drivers
    • HW-dependent: For Intel: pacman -Syu xf86-video-intel libva-intel-driver
  • HW-dependent: For intel video drivers, add config file to disable compositing
    • /etc/X11/xorg.conf.d/20-intel.conf
Section "Device"
Identifier "Intel Graphics"
Driver "intel"
# Option "AccelMethod" "sna"
# Option "TearFree" "true"
EndSection
Section "Extensions"
# fixes tearing
Option "Composite" "Disable"
EndSection
  • Add config file to enable XBMC to power off and reboot
    • /etc/polkit-1/rules.d/10-xbmc.rules
polkit.addRule(function(action, subject) {
if(action.id.match("org.freedesktop.login1.") && subject.isInGroup("power")) {
return polkit.Result.YES;
}
});
  • Add user and add that user to appropriate groups(replace username with your actual username)
    • useradd -m -g users -G video,audio,storage,power,games,network,optical username
  • Set password for new user (replace username with your actual username)
    • passwd username
  • Configure and enable services
    • Optional, perform if ntpd was installed: 
      • Change the ntp servers in /etc/ntp.conf to local ones
      • systemctl enable ntpd
    • Optional, perform if avahi was installed:
      • Not sure if it is needed or not, but I added mdns4 to the end of the hosts line in /etc/nsswitvh.conf
      • systemctl enable avahi-daemon
  • You might want to configure ssh and sftp, depending on how you want the setup to work.
    • nano /etc/ssh/sshd_config
  • Setup a swap file
    • fallocate -l 2048M /swapfile
    • chmod 600 /swapfile
    • mkswap /swapfile
    • swapon /swapfile
    • Add the line below to /etc/fstab
      • /swapfile       none    swap    defaults        0 0 
  • Finally, we need to set it up so that XBMC starts automatically. This got more difficult recently, when xorg-server 1.16 was released... There are a couple of ways of doing this, I chose this one because I found it the easiest.
    •  Add a file: /etc/X11/Xwrapper.config with the following text in it
      • allowed_users = anybody
        needs_root_rights = yes
    • Manually add the xbmc user
      • useradd -m -c 'XBMC user' -G audio,video,network,optical,storage,power,games -d /var/lib/xbmc -s /usr/bin/nologin xbmc
    • Create the xbmc service file: /etc/systemd/system/xbmc.service
      • [Unit]                                                                                                      
        Description = Starts instance of XBMC using xinit
        After = systemd-user-sessions.service network.target sound.target
        Conflicts=getty@tty7.service
        [Service]   
        User=xbmc
        Group=xbmc
        PAMName=login
        Type=simple
        TTYPath=/dev/tty7
        ExecStart=/usr/bin/xinit /usr/bin/dbus-launch --exit-with-session /usr/bin/xbmc-standalone -- :0 -nolisten tcp vt7
        Restart=on-abort

        [Install]                                                                                                       
        WantedBy = multi-user.target
    • Enable the service
      • systemctl enable xbmc
  • Reboot and enjoy


Saturday, July 26, 2014

Using the Zoom slider on Microsoft Natural Ergonomic Keyboard 4000 for scrolling

I got the Microsoft Natural Ergonomic Keyboard 4000 a while back, and thought about using the zoom slider for scrolling quite early on. After a bit of googling, it was clear that I wasn't the only one who had that idea. It did seem quite complicated though... so I kept putting it of. Now I decided to finally give it a real try, and due to some changes, it turns out to be quite simple :)

To be honest, this is not true scrolling, I'm mapping the zoom in and out to page up and down. Those buttons already exist, so some might think it redundant, but I find that the zoom slider is nicely placed in the middle of the keyboard, so it works for me. Also, you could, using this method, map it to just about any function.

The changes that have been made in Linux, in particular, the integration of systemd and udev, means that a lot of the older solutions you might find do not work. The keymap command no longer exists, for example.

  1. Create a file: /etc/udev/hwdb.d/61-keyboard-local.hwdb
  2. Paste the following text (exclude the "1."):
    1. # Microsoft Natural Ergonomic Keyboard 4000
      keyboard:usb:v045Ep00DB*
       KEYBOARD_KEY_c022d=pageup
       KEYBOARD_KEY_c022e=pagedown
  3.  In terminal, rebuild the HW DB index: sudo udevadm hwdb --update
  4. Reboot
  5. Your zoom in/out slider should now function as page up/down.

In case anyone is interested in how I came to this...

The reason I didn't need to fiddle about with evtest and event numbers etc, is that the work has already been done. If you look in  /lib/udev/hwdb.d/60-keyboard.hwdb, there is already an entry for this keyboard, and for these keys:
# Microsoft Natural Ergonomic Keyboard 4000
keyboard:usb:v045Ep00DB*
 KEYBOARD_KEY_c022d=zoomin
 KEYBOARD_KEY_c022e=zoomout
Now, you could just change it in that file, but that means that it will stop working if it is updated, better to add a separate file. So all that is needed is a hwdb file with a higher index (under etc rather than lib, to keep it separate). The point is that we can use the syntax, including VID, PID, and keycodes, in our new config file.

As I said in the beginning, you could map them to pretty much anything you like. I tried, but did not get scroll up/down to work for some reason... Anyway, if you feel like trying other things, here is a link to the list of key-mappings that you could use to map it to.
 

Tuesday, July 22, 2014

Ice Cream Cones

Here is the recipe for the cones that I made in the last post.

There was a recipe that came with the waffle iron, but it's a fair bit more complicated than this one, and I didn't have all the ingredients at the time. I might give it a try later, but for now, this is a very simple recipe for waffle cones, and it's still delicious.

This recipe makes about 5-6 ice cream cones, but you can of course double it (or more) if you like.

Ice cream cone


Ingredients
1 Egg
0,5 dl sugar
1 dl Flour
1 tbsp Vegetable oil (something without a lot of flavor, like rapeseed oil)
0,5 tsp Vanilla powder


Whisk the egg and sugar until it's fluffy (a couple of minutes at least).

Whisk in the other ingredients.

Cook in the waffle maker, and roll into cones immediately, before they harden.


Tuesday, July 15, 2014

Wilfa CC-1 Review

The Wilfa CC-1 is a waffle cone maker. It's basically the same as a waffle iron, but it produces much thinner waffles that become crisp, to make ice cream cones.

Wilfa CC-1


Having never used another waffle cone maker, I don't really have anything to compare it with. That said, it seems to work quite well. The waffles come out fairly evenly cooked, and look nice.

The problems I have with this piece of kit don't really have anything to do with the device itself.

  1. The manual, it's poor. A waffle iron is a pretty simple thing, to be sure. Still, there are 2 features that stand out on the device, the red and green lights on top, and the dial in the center. Neither of these things are even mentioned in the manual that comes with it! It's not that hard to figure out (I really hope I got it right after saying that), the lights indicate if the iron is up to temperature or not, and the dial is to set the temperature. It would be nice though, to have some indication of what temperature to use! I just set it in the middle, and that seems to work quite well.
  2. Do you really need to make your own waffles? It's fun and all that, but unless you plan to experiment to find the perfect recipe for your cones, or you go through a, frankly, ridiculous amount of them, I'm not entirely sure I see the point of this as compared to just buying some.

As I said though, If you are after a waffle cone maker, then this is quite a good one.

Oh, and it has a "Österdalsmönster" (this is the pattern on the waffles). Some seem to rave about this, but to be honest, personally, it doesn't really matter to me.

Cone


Actually rolling the cones turned out to be quite tricky. You have to be fast, before the waffle cools enough to harden (this happens quite quickly), meanwhile you're trying to get the cone shape without burning yourself to much... I'm sure this gets easier with practice though.

I'll come back with a recipe for the cone shown above soon.

Sunday, July 13, 2014

Time for a new Distro

I've been using Linux Mint Debian Edition for a while now, and I've been pretty happy with it. But when Linux Mint 17 came out, I noticed that the version of Cinnamon that I was using was actually lower than the one used in LM17. We can't have that now can we?

I looked a little bit at Linux Deepin, which has had some press recently. It's a good looking distro, no doubt about it. In fact, I think it just might take over, from the now defunct Pear OS, as the best looking Linux distro. However, after trying it on a live USB, I came to the conclusion that it would drive me nuts in a matter of days. it's a little to Windowsey for me, and I really don't like the way the dock works.

In the end I went with Linux Mint 17. It's a safe bet, but/and it's really good.

Saturday, July 12, 2014

Simple Chocolate Sauce

This is a chocolate sauce for ice cream or other desserts. It's simple, quick and delicious.

When I say that it's simple and quick, I mean that it contains 3 ingredients, and takes just a few minutes to make!

Basically... I'll never buy ready-made chocolate sauce again.

I like my chocolate sauce quite bitter, so I only use about a tablespoon of sugar, but if you like it sweeter, just add more sugar.

Chocolates sauce (over vanilla ice cream)


Ingredients
100g Dark chocolate (70%)
1 dl Water
1 tbsp - 1 dl Sugar (according to taste)


Break the chocolate into pieces, and add it and the other ingredients to a pot. Heat on a medium heat, while stirring, until the chocolate and sugar has melted and the sauce becomes even.

Tip#1: If the sauce seems a bit thick, just add a small amount of water.

Tip#2: If you have sauce left over, put it in an airtight container and place in the fridge. It'll keep for about a week. When you want it, just reheat in the microwave to re-melt it. 

Monday, June 30, 2014

Vanilla Ice Cream

I know it's basic, but at the same time, a really good vanilla ice cream, is just about the greatest thing there is...

And of course, it works as a basis of other flavors (I used this as a basis for my recipe for Earl Greay Ice Cream).

Vanilla Ice Cream


Ingredients
2 dl Milk
3 dl Whipping cream
1 tbsp Glucose syrup
6 Egg yolks
1,25 dl Sugar
1 Vanilla pod
1 Gelatin sheet

Place the gelatin sheet in a bowl of cold water to soften.


Split the vanilla pod down the middle and scrape out the seeds. Pour the cream, milk, glucose syrup, vanilla seeds and vanilla pod into a pot and mix. Bring it to a boil, while stirring, as soon as it starts boiling, take it off the heat. Let it sit for about 20 minutes to infuse.

Whisk the egg yolks and sugar together in a bowl.

Whisk the milk-mixture into the eggs, and pour into a clean pot. Heat, while constantly stirring, until it thickens and the froth on top disappears (80-85°C, no higher).

Take the pot of the heat, and dunk the bottom of the pot into a bowl of cold water (or just fill your sink to 10cm or so with cold water, and use that). The point is to take the heat out of the pot so that the custard doesn't keep cooking.

While the custard is still hot, take the gelatin sheet out of the cold water, and squeeze it so get rid of as much water as you can. Add it to the custard and whisk it in.

Strain the custard into a clean bowl, and set in the fridge to cool.

Once it's cooled, at least to room temperature, churn in the ice cream machine.

Sunday, June 1, 2014

LMDE Review

I've been using Linux Mint, on and off, for a number of years now, and I really like it. For quite a while I was on Linux Mint 16 (I realize that 17 just came out), but a couple of months ago I decided to give LMDE (Linux Mint Debian Edition) a try. 

Linux Mint Debian Edition


Linux Mint Debian Edition, or LMDE, is a version of the very popular distribution Linux Mint. While the "normal", numbered, editions of Linux Mint are based of Ubuntu, LMDE is based on Debian Testing instead. Aside from what distro they are based on, the idea is that they should be the same.

First off, the installation procedure. It's different from the Ubuntu-based version, but I actually prefer this one. The Ubuntu installer (and the slightly modified one used in the main version of Linux Mint) is simply great, it's simple, intuitive, and looks nice to boot. The only problem I have with it, is that it's, in a sense, too simple. I feel like I'm not really the one in control, but rather I have to trust in that the Ubuntu team has done things correctly.

The LMDE installer still provides a nice, simple interface for installation. It does not by any means require you to be an expert in order to install it. It does show you a little bit more of what is going on, and provides you with just that little bit of added control of the process, which means that it feels very comfortable to use.

Once installed, there are only 2 visible indications that anything is different from the "normal" version. The first is the background, which has a Debian logo instead of the number of the LM version. Personally, I think the Debian logo looks better. The second is the font used for menu-button, icons, etc. Here I go the other way, the Ubuntu-based versions font is better. LMDE's font seems somehow smaller and thinner, making it slightly less readable. It is by no means a disaster, but it's not quite as good as the original.

For everyday use, things run smoothly and quickly, there is no sense that you are using a distro that is inferior to the Ubuntu-based version. The settings app and program manager look no different from that found in the "normal" version.

After a couple of months of use, I've only really found one bug. It's in the regional settings, and it's not as if that is something that you tend to mess with a lot.

I had a bit of trouble installing BankID due to the repositories being different from the Ubuntu-based ones. But then BankID is kind of a special case. I imagine that other applications which do not come from the default repositories might have similar problems in terms of dependencies.

All in all, I have to say that the Linux Mint team has succeeded very well in making LMDE the same as the "normal" version. There are a couple of very minor downsides, but then there is a major upside as well - LMDE is rolling distribution, which means that there is no need to reinstall when a new version becomes available. This seems especially beneficial now that Ubuntu only has 9 months support on their non-LTS versions. Only 9 months support means that you need to either run the LTS version, or reinstall every time a new version comes out (which has its own charm). I hear that Linux Mint may start to base each of their versions only on the Ubuntu LTS, so we'll see where that goes.

For now though, I'm sticking with LMDE. It is definitely good enough, that I don't see any reason to return to the numbered versions. And really, I don't think that there is any higher praise to give than that.

Thursday, April 24, 2014

Earl Grey Tea Ice Cream

Earl Grey Tea Ice Cream is something that I've been thinking of trying for a little while now. It just seemed to me to be a flavor that should work... And what do you know, I was actually right!

Bergamot tea, with a hint of lemon, in a smooth ice cream, turns out to be really great. Just strange enough to make it interesting, but not so strange that it no longer corresponds to our idea of what ice cream is.

This is the first time I've used both glucose syrup and gelatin in ice cream as well. Neither is strictly necessary, but they really does give the ice cream a better texture.

Earl grey tea flavored ice cream


Ingredients
3,5 dl Milk
1,5 dl Whipping cream
1 tbsp Glucose syrup
6 Egg yolks
1,25 dl Sugar
5 tsp Earl grey tea
1 Lemon
1 Gelatin sheet


Place the gelatin sheet in a bowl of cold water to soften.

Peel the rind of the lemon, using a vegetable peeler or similar. It needs to be thin enough that you don't get the white stuff.

Pour the cream, milk and glucose syrup into a pot and mix. Bring it to a boil, while stirring, as soon as it starts boiling, take it off the heat. Add the tea and lemon rind, give it a stir, and let it sit for 5 minutes to infuse.

Whisk the egg yolks and sugar together in a bowl.

Once the 5 minutes are up, strain the milk-mixture through a fine sieve. I found that I still had some small bits of tea leaf at this point, so I recommend straining it through a piece of muslin (or if you're REALLY patient, and/or don't have muslin, a coffee filter).

Whisk the milk-mixture into the eggs, and pour into a clean pot. Heat, while constantly stirring, until it thickens and the froth on top disappears (80-85°C, no higher).

Take the pot of the heat, and dunk the bottom of the pot into a bowl of cold water (or just fill your sink to 10cm or so with cold water, and use that). The point is to take the heat out of the pot so that the custard doesn't keep cooking.

Take the gelatin sheet out of the cold water, and squeeze it so get rid of as much water as you can. Add it to the custard and whisk it in.

Strain the custard into a clean bowl, and set in the fridge to cool.

Once it's cooled, at least to room temperature, churn in the ice cream machine.

Uncooked custard
Cooked custard


Starting to churn
Almost done


Sunday, April 13, 2014

BankID with card reader on LMDE

Update: This no longer works. It seems that the changes done for BankID have now gotten to the point that banks etc have upgraded and this old version no longer works...

I've previously made guides for doing this on Ubuntu 13.04 and 13.10. Today I installed LMDE (Linux Mint Debian Edition), and getting BankID to work there had some additional difficulties.

I know... BankID is very soon ending the support for Linux completely, but for now I want to be able to use it. So here's how.

The main problems under Debian, is that nspluginwrapper and one if the dependencies of the driver for the card reader (the i386 version) have been removed from the repositories. That means that there are a couple of fairly "ugly" tricks that I had to do in order to get this to work. Doing this means that some packages will not be updated, so if you don't feel comfortable with that, don't do this.

There is a lot of good information on the Ubuntu wiki for Nexus Personal, but since it tries to encompass everything, I find it a little difficult to follow. It's a good resource for debugging though.

The card reader that I have is a Digipass 920, so if you are using something else, you may need to change out the driver for the one appropriate for you device.


Do keep in mind that the BankID application will not be automatically updated. If you need to update to a new version you'll have to download and install it again as described below.
  • Get the BankID application from https://install.bankid.com/Download?defaultFileId=Linux (the website blocks 64-bit Linux from the "regular" download procedure, so if you're downloading from that you need to use this direct link)
  • Unzip the application
  • Open a terminal and go to the directory that you unzipped the application to, and type in the following command (Please note that the version number will change):
    • sudo ./install.4.19.1.11663.sh i
  •  Enable multiarch support
    • sudo dpkg --add-architecture i386
      sudo apt-get update
  • Install some needed packages
    • sudo apt-get install pkcs11-data:i386 libstdc++6:i386 libidn11:i386
  • Next we need to install nspluginwrapper, as I stated above, this is no longer part of the standard repositories, so it requires a bit more work. Basically we are adding an older repository in order to install it. You could also install it from source, but that would probably leave you with some problems with regards to dependencies, this is (in my opinion) the easiest way
    • open the config file for your repositories
      • sudo gedit /etc/apt/sources.list 
    • Add the following line to it
      • deb http://ftp.au.debian.org/debian/ squeeze main contrib non-free
    • Save and close
    • We can now install nspluginwrapper with its dependencies
      • sudo apt-get update
      • sudo apt-get install nspluginwrapper
  • Now to install the driver for the card reader. The actual driver is still there, but not one of its dependencies, so we will need to install that manually first
    • Now we can install the driver
      • sudo apt-get install pcscd:i386
  • The repository that we added in order to install nspluginwrapper conflicts with Linux Mints repository, so we need to remove it
    • Open /etc/apt/sources.list, in the same as as above, and remove the line that we added to it
  • Go back to the terminal and give the following command:
    • sudo nspluginwrapper -i /usr/local/lib/personal/libplugins.so
  • Start/restart Firefox, go to Tools -> Addons and check that you can see Nexus Personal under Plugins
  • Give it a try, it should now work

Friday, April 11, 2014

Strawberry Pie

This is probably my favorite thing to eat in the world. It's my grandmothers recipe, and it is the taste of summer to me.

Strawberry pie


Ingredients - Pastry
100g Butter
1,5 dl Sugar
1 Egg
3 dl Flour

Ingredients - Filling
1 dl Sugar
2 tsp Vanilla sugar
1 Egg
3 dl Creame fraiche
300-350g Strawberries


Start with the pastry. Whisk room temperature butter and sugar until fully incorporated. Whisk in the egg. Add the flour and mix with your hands to an even dough. Wrap in plastic foil and place in the fridge for about 30 minutes.

Butter and flour a pie mold (Smear the inside with butter, then shake some flour around inside it so that it covers everything). If you have one, you can use a "proper" one, here I'm using the disposable aluminium kind (23cm).

Place the pastry dough in the mold, and use your hand to press it into and even sheet, covering both the bottom and the sides. Make sure that the dough goes up over the edges a little, since it tends to slip down during the blind baking.

Bake in the middle of the oven, at 200°C, for 10 minutes. If the sides do sag a bit, don't panic, it's not the end of the world, it'll still taste nice.

For the filling, mix the sugar and vanilla sugar, then whisk in the egg, and finally the creame fraiche. Pour the filling into the mold, then add the strawberries. If the strawberries are small, you can use them whole, otherwise cut them in half. Dot them throughout the pie, basically as many as you can fit without placing them on top of each other.

Bake in the middle of the oven, at 200°C, for 20-25 minutes, until the edges of the filling just starts to color. It'll still be rather liquid in the middle, don't worry, it'll firm up as it cools.

Let the pie cool a little, then place in the fridge to cool completely. This pie should be enjoyed cold.

Butter and sugar, a good start
Add an egg


Finished pastry dough

Buttered and floured


Dough in mold
After blind baking


Filling
Added filling


Added strawberries
Just needs to cool

Thursday, March 13, 2014

Danish Pastries

Danish pastries  or "wienerbröd" as they're called in Swedish, are made with a kind of puff-pastry, and can be filled with a variety of fillings. You can use, for example, a thickened vanilla custard, raspberry jam or almond paste. It can then be topped with some frosting or chocolate. They also come in many different forms. This is my first time making Danish pastries, so I've gone with a very simple folding of the pastry, and my favorite "additions", a thickened vanilla custard filling, and drizzled with chocolate.

Now, in most of my recipes I say how easy it is to make, and how quick it is. In this case though, that simply isn't true. This pastry is quite difficult to make, or at least, to make it well. It's also quite time consuming, and laborious. To be honest, mine did not turn out perfect. That said, imperfect as they were, they still looked and tasted very nice, so don't despair too much.

Tip#1 These pastries are very much best when freshly made, a night in the fridge will severely diminish (though not completely destroy) their deliciousness.

Danish Pastries


Ingredients
50g Yeast (fresh)
2,5 dl Milk
1 Egg
0,5 tsp Salt
2 tbsp Sugar
7-8 dl Flour
300g Butter

1 Egg for brushing
Thickened vanilla custard (shop-bought, or make your own)
Chocolate for garnish

Ingredients


Tip#2 For starters, make sure that your ingredients are cold, you don't want it to get to hot or rolling will become more difficult than it already is (also, the dough might start to rise early). 

Tip#3 Be very gently when rolling out this dough, you want to avoid having any holes in the dough. It is (it seems to me) virtually impossible not to have this happen at any point in the process, but try to avoid it as much as possible.

Crumble the yeast into the milk, and use your fingers to make it dissolve. Add the egg, salt, sugar and flour (start with about 7 dl, and see if you need more), and mix into a dough. Try not to kneed the dough more than necessary at this stage, we don't want the gluten to develop. The finished dough should be slightly sticky, but workable, ie not too much. Wrap in cling film and leave in the fridge for about 15 minutes.

Get the butter out of the fridge, and slice it into 9 slices, about equal. Put the slices on some grease proof paper and let it come to room temperature.

Lightly flour the table and get the dough from the fridge. Now, we want the dough to be rectangular in shape, and here is were a learned a neat little trick while doing research for this bake. Form the dough into a ball on the table, cut a cross, about halfway down into it, now fold the "flaps" out. Presto, a square piece of dough!

Roll out the dough to about 30x40 cm. Place the butter slices on one half of the dough, leaving 2-3 cm on each side free. Fold the edges of the dough over the butter, then fold the other half of the dough over that. Pinch the edges together so that they are sealed.

Turn the dough 1/4 turn, so that the folded edge is towards you. Gently roll it out to about 1 cm thickness, trying to retain the rectangle shape. Fold the dough in 3, ie 1 third folds in to the middle of the remaining 2 thirds, and the other third folds over that. turn the dough 1/4 turn again, and repeat the rolling out and folding. Wrap in cling film and put it back in the fridge again for about 15 minutes.

Take the dough out of the fridge, repeat the rolling out and folding once more, and then finally roll it out for the last time. Cut the dough in half, wrap each part in cling film and place in the fridge for about 15 minutes.

Take one part of the dough out of the fridge, roll it out to a square (or the nearest approximation) 36 by 36 cm in size. Cut the dough into 9 by 9 cm squares, place on a baking tray, covered with baking paper. Put a dollop of thickened vanilla custard in the center of each, then fold the corners over the center, and press down in the center so that they stick. Cover with a kitchen towel, and let rise for about 1 hour. Repeat for the second sheet of dough.

Whisk the egg, and brush the pastries with it. Bake, in the middle of the oven, at 250°C, for about 9 minutes. Let them cool, at least to the point where they are not to hot to handle anymore.

Melt some chocolate in a bain-marie (in a bowl over boiling water), and drizzle it over the cooled pastries.

The whole ball of... dough?
Cut a cross to make a square

Fold the flaps out

Rolled out

Add butter

Fold the edges over

And seal

Rolled out again

9x9 squares

Add custard and fold

Baked